Do you miss bread? Try making your own – it is easier than you think. With a variety of wonderful gluten-free and wheat-free bread mixes out there, you can produce great-tasting bread to use for sandwiches, toast, stuffings, and even French toast! Follow these steps to see what it takes to make gluten-free bread. You will need about a 2-3 hour block of time, and a heavy-duty mixer is recommended (KitchenAid is well worth the money). You do not need a bread machine, but many recipes have instructions for both the oven and bread machine. Every bread mix has different instructions, so read them carefully. And if your bread isn’t perfect the first time, try again – the reward will be worth the effort!
Step 1: Find a good bread mix.
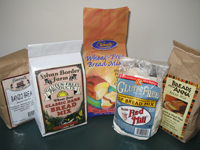
There are many great bread mixes out there. Some of my favorites are:
- Pamela’s Amazing Wheat-Free Bread Mix
- Breads from Anna’s Bread Mixes
- Bob’s Red Mill Homemade Wonderful GF Bread Mix
- Sylvan Border Farms Dark Bread Mix
- Laurel’s Banzo Bread Mix
Step 2: Proof yeast
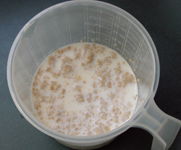
Some bread mixes require you to proof the yeast. Proofing yeast means that you will whisk or stir a packet of yeast (usually included with the bread mix) in a bowl of warm water or milk (100-110 degrees F, which is probably the temperature of your hot tap water). After about 5-10 minutes, the yeast forms a creamy foam on the surface of the liquid. If there is no foam at all, that means the yeast is dead and you will have to use a new yeast packet. Some bread recipes have you put the yeast directly in the mixer bowl without proofing first.
Step 3: Add ingredients and mix
All bread mixes will require the addition of other ingredients such as:
- eggs (or egg replacer)
- butter (or oil)
- milk (or non-dairy milk such as rice or soy)
- vinegar
- seeds, nuts, or herbs (optional)
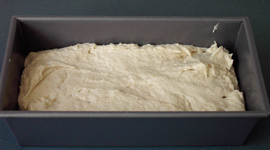
All the ingredients are then mixed together, usually for about 3 minutes. The consistency of the dough is usually sticky, like a thick cake batter.
Step 4: Put the dough in a loaf pan and let it rise
Spoon the dough into a loaf pan. Most recipes call for a 81/2 by 41/2 inch loaf pan. The pan should be greased or oiled (use a paper towel and rub the inside of the pan with shortening, butter or oil, or use a spray oil). Spread the dough evenly in the pan. If it seems too sticky, put a little oil or water on your spatula and then smooth the dough.
Leave the dough to rise. To do this, loosely cover the dough with plastic wrap or aluminum foil and put the pan in a warm place, like on top of your stove (provided you are not cooking something else because then it would be too warm).
Quick Tip: If you don’t have a warm place for your dough, turn on your oven to the lowest temperature for about 30 seconds to 1 minute, then turn it off. Put your dough in the oven to rise (just remember to take it out before you preheat your oven for baking).
Let the dough rise until it doubles in size or is even with the top of the pan. This can take anywhere from 25 to 70 minutes, depending on the mix. You should probably check on the dough earlier than the recipe says so that the dough does not rise too much, and so that you have time to preheat the oven. If you don’t have a timer, you should get one.
Step 6: Bake the bread and eat!
Time to bake the bread. Depending on the recipe, this takes from 45 to 65 minutes. Some recipes will have you cover the bread after a little while so that it doesn’t get too dark on top. In general, you want the bread to sound hard and hollow when you tap the top of the loaf. Turn the loaf out on a rack and let it cool completely before you slice it.
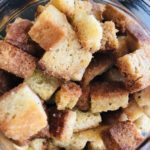
You may now eat your wonderful creation! After the bread has cooled, store the bread in a sealed plastic bag. It will stay good for at least a week. If you want it to last longer, you can put it in the refrigerator or freezer, but the texture will be compromised a bit. You can use stale bread to make croutons — just brush chunks with oil and salt and herbs, and toast or bake.






what people are talking about